Showing posts with label Sash and Saber. Show all posts

Monday, 13 August 2018

Freeman's Farm 1777

We played this one a few weeks ago.  Freeman's Farm 1777 or 1st Saratoga.  This one is interesting since the American's are on the offensive for once.  The American's are under Benedict Arnold while the British are under John Burgoyne, both of which are excellent commanders. Their objective is to break Hamilton's brigade.  Fraser's Brigade is nearby in a redoubt containing two gun batteries and elite troops.  Unfortunately the British needed to roll a twelve each term to unlock some of these forces which never happened.  A Hessian Brigade was also scheduled to reinforce however the American's had routed Hamilton long before their planned arrival so we called it a game.  The first American victory we have had in our series of AWI games.  Unfortunately I got caught up in the game and I did not think to take many pictures.  I didn't even get any pics of the farm.  Doh!  Bemis Heights..or 2nd Saratoga is up next.

This is Fraser's Brigade on the right flank of the British.  This redoubt was an anchor for the whole army and they were not allowed to leave it, much to the British dismay. The American's (Brigadier Poor) had to advance their columns past this position taking significant flanking fire from the British artillery, but not enough to stop them. 

Learned's Brigade reinforces the Centre through the forest.  The vattle is over before they can arrive.  Also seen is General Benedict Arnold urging them forward.   An element of the the British 21st foot can also be seen after having driven off the crew of the American grasshopper gun, which did much damage before retiring. 

Learner leading the advance of his Brigade.

Tory's and Indians fire on Dearborn's Light Infantry Battalion under Morgan;s command.  Daniel Morgan, despite having the best troops in the American Army did not make much progress in this battle against Hamilton.

The 2nd NY Continental Regt, which earned honours by driving the British 62nd foot from the field.  This more than anything caused Hamilton's brigade morale to deteriorate. 

Hamilton's skirmishers and artillery successfully held his left flank, while the infantry o the right were decimated.  Because of the treeline, the artillery was not as helpful as it could have been.

Hamilton's infantry being assailed from two directions.  The American Militia even successfully assaulted against them with distinction.  

White Plains 1776

Have not posted for a while but we played this one a few months back.  The Battle of White Plains, New Jersey 1776.  British were under Lt. General Leopold von Heister, the Americans were under Colonel McDougall. British forces needed to seize a redoubt on top of a hill.  British had very superior forces and decided to outflank on both the right and left as well as a full frontal assault which arrived first and was successful.  The American's meanwhile needed to hold on as long as possible while inflicting more casualties on the British which did not happen.  British had a minor mishap when orders were given for the right flanking column to go left when they meant right.  This was sorted out before too long and they were able to change direction.  The game was a major British Victory.

This is a view from the redoubt, held by artillery and American Militia. Haslets Battalion and skirmishers can be seen at the foot of the hill.  This command was isolated at the front and very exposed to the British masses. 

These were the limited American reserves under Colonel McDougall behind the American redoubt.

The British had a 3 gun 12 pound battery flanking the American redoubt on a hill across the Bronx river.  Because of the range this battery was extremely ineffective. 

Meanwhile the Hessians under Col Rall rolled a "6" on the first turn allowing them to finish construction of a bridge alloing them to get into the fight right away.  More bad news for the Americans!

Hessians cross at the quickstep.  

Hessian Jaegers engage McDougall's Skirmishers on the right flank.

The 17th Light Dragoons travel by road to their start off point.  they never did get into combat but they were not really needed. 

Rall's Hessian Brigade moves along the road to position themselves for a left flank attack on the American line of battle.

Meanwhile Colonel McDougall starts to move the reserves to the threatened left flank.

Meanwhile the Hessian Leib Regt. advances up the centre towards the redoubt. Putnam's skirmishers try to hold them back to no avail/ 

View from the American trenches wile the Hessian's Advance.  Haslet's Brigade can still be seen to the front playing interference with them. 

McDougall's Brigade continues to more toward the British left flank/

British Light Infantry give three hurrah's and drive off the American Skirmishers. 

The British Line arrives under General Leslie.  Unfortunately his orders initially send him in the wrong direction. 

Outflanking continues against the Americans.


Aerial view of the British (Hessian) left flank.  The pressure is on for the outnumbered Americans

The British line get new orders and advance against the right flank.

Hessian's are getting closer. 

The American reserves move to counter the Hessians.  Meanwhile the British break through into their rear while the Hessian Leib Regiment overran the redoubt capturing numerous American militia in the process.  It was game over for the Americans.


Thursday, 8 March 2018

Guilford Courthouse 1781


Played a game with my 40mm AWI for the first time in a long time.  AWI is really a good
period to play with larger figures as the battles are quite manageable in terms of numbers. 
Perfect for my rules of choice, Carnage and Glory.  The 40mm scale is easy on the older
eyes, both for painting and just for seeing on the battlefield.


Guilford Courthouse is an interesting battle pitching a elite/line force against a larger
militia/line force.  Historically the Americans deployed their troops into three lines.
The first two were milita lines and I rated them raw and trained respectively.  These first
two lines were situated in a wooded area. In history the militia lines were asked not
to fall back until their had fired at least two volley.  In our game the British chose to
be very aggressive charging at every opportunity and pushing the militia before them. 
Out of six milita units in the first and second line, all but one of them retreated without
firing upon being charged. By the time the British moved out if the woods towards the
third line of continentals, the American army morale was starting to be affected on account
of the militia performance.  In history it is aid that the British forces were pretty degraded
by the time they hit the third line and that the fight was toe to toe.  In our game the
continentals gave a good account of themselves but the British still seemed to have the a
advantage.  The militia just did not have much opportunity to affect the British.


I was worried I had created an uneven game but in researching the battle the British

lost about 400 men vs 1300 for the Americans...a 1000 of which were Militia who went
missing.  In our game the British lost about 400 men vs 1900 Americans of which 800
were missing militia.  So.....in retrospect it was not that far from historical.  While the
British won the battle historically, it was considered a strategic loss as Cornwallis was
not able to replace these troops as easily as the Americans could.  That said American
losses were about 3 to one historically, but almost 5 to one in the game.


The view of the battlefield from the American side; just behind the courthouse.
First line of North Carolina Militia awaiting the British advance.
They were rated as raw and it showed.


North Carolina Militia skirmishers. None of the militia stuck around after being charged.  They skedaddled!!


On the British side, Leslie's Brigade on the right flank prepare to advance against the fence line.

British Guards and Artillery under Brigadier O'Hara advance up the road in the centre.

Brigade Webster advancing on the British Left flank.


Aerial view of the British advance once over the Fence and into the woods.

Webster's Light Infantry skirmishing.

The Guards plodding up the road.

Add caption

Royal Artillery limbered up and moving up the road.

Sunday, 26 July 2015

Battles of Yore Part 1: 40mm AWI

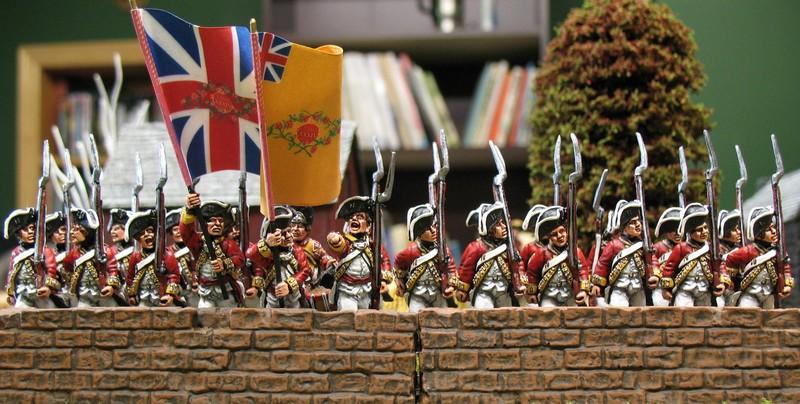
This is the first part in a series of posts to display photos from old games played in Nova Scotia before I moved to Ontario.  All of these are 8+ years old and may come from multiple games. Back then I only had 4 collections: 28mm Napoleonic, 28mm Sudan, 28mm Franco Prussian War and 40mm American War of Independance. This series will cover the "best of" photos for each of the latter three collections.  I could not find any old Nappie photos I thought worth sharing so obviously I need to run a few games! The vast majority of the figures below are Sash and Saber 40mm.


As usual, let's start off displaying the field of battle
This was a fictional scenario.


The old war-room was in the attic of a 
hundred year old house.  Too hot to play
during the summer....which is probably a good thing!
L-R Me, Ross, Gary


The Nova Scotia Fencibles


Napoleonic French Converted to AWI